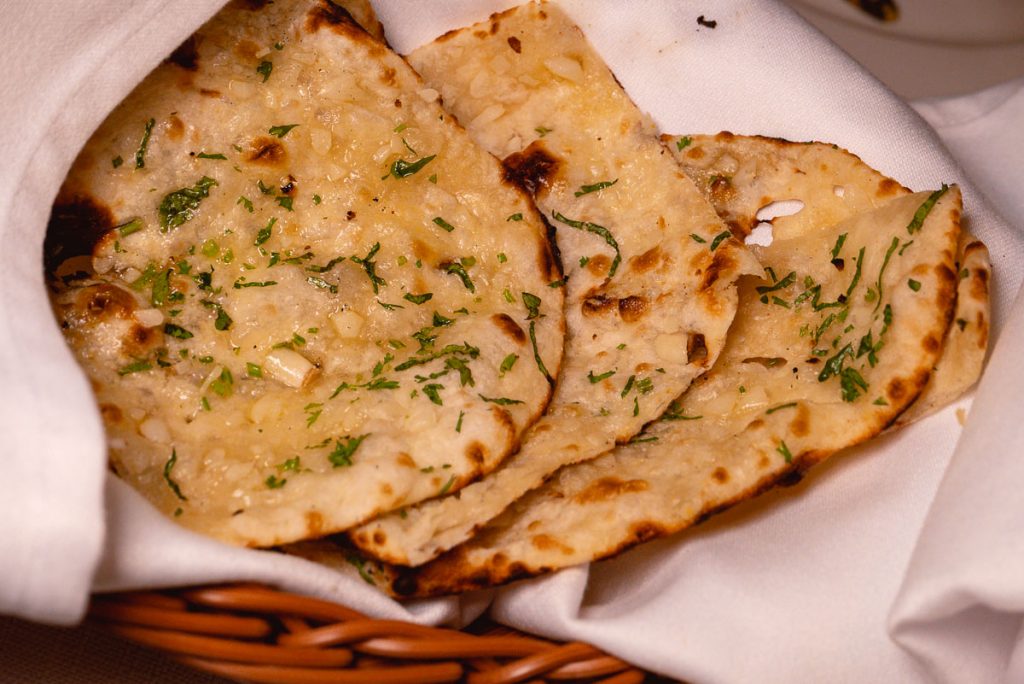
Tandoori Roti is a popular, traditional Indian bread that is a staple in many parts of the country. Its unique flavor and texture come from the method of cooking it in a tandoor, a traditional clay oven that imparts a smoky, charred flavor to the bread. Tandoori Roti has long been cherished for its soft, chewy interior and crispy exterior, making it an excellent accompaniment to a variety of curries, gravies, and kebabs.
In this article, we’ll explore the origins of Tandoori Roti, the process of making it, and how it fits into Indian cuisine. We will also discuss its variations, pairing options, and tips for making it at home, whether you have a tandoor or not.
The Origins of Tandoori Roti
The term “tandoori” comes from the tandoor, a traditional clay oven used in many parts of the Indian subcontinent for centuries. The tandoor is believed to have originated in ancient Persia and made its way to the Indian subcontinent through trade and cultural exchanges. It is made from clay and has a cylindrical shape, which allows it to reach high temperatures, making it perfect for cooking breads, meats, and other dishes.
The process of cooking bread in a tandoor goes back thousands of years, with the earliest mentions of flatbreads and roti found in ancient texts. While the naan is the most famous tandoori bread internationally, Tandoori Roti is simpler and more rustic, made with whole wheat flour (atta) and traditionally cooked without any added fat or dairy, giving it a hearty, wholesome flavor.
The Process of Making Tandoori Roti
Making Tandoori Roti is an art, and while it traditionally requires a tandoor oven, it can be adapted for use in a conventional oven or stovetop. Here’s a step-by-step guide to making Tandoori Roti:
Ingredients:
- 2 cups whole wheat flour (atta)
- 1 tsp salt
- 1 tsp sugar
- 1 tbsp yogurt (optional, for softness)
- ¾ cup warm water
- 2 tsp active dry yeast (optional for fluffiness)
- 1 tbsp ghee or vegetable oil (for brushing)
Instructions:
-
Make the Dough:
- In a mixing bowl, combine the whole wheat flour, salt, and sugar. If you’re using yeast, add it to the dry ingredients.
- Gradually add the warm water and knead the dough for about 8-10 minutes until it becomes smooth and elastic. You can add yogurt during kneading to enhance the dough’s softness.
- Cover the dough with a damp cloth and let it rise for 1-2 hours in a warm place until it doubles in size.
-
Preheat the Tandoor or Oven:
- If using a tandoor, ensure it’s preheated to a high temperature (around 500°F or 260°C). If you’re using a regular oven, preheat it to the highest setting (usually around 500°F/260°C) and place a baking stone or inverted baking sheet inside to mimic the hot surface of a tandoor.
- Tandoori roti gets its distinctive texture from the heat of the tandoor, so it’s essential to get the oven or tandoor very hot before cooking the bread.
-
Shape the Roti:
- Once the dough has risen, divide it into small balls, about the size of a golf ball.
- Roll each ball into a flat, round shape using a rolling pin. The dough should be about 1/8-inch thick.
- If you’re cooking in a tandoor, lightly wet one side of the dough and place it on the tandoor’s hot walls. The wet side will stick to the walls of the tandoor, and the dry side will cook.
- In a conventional oven, you can bake the roti on a baking stone or a preheated baking sheet, placing it directly onto the stone.
-
Cook the Roti:
- In the tandoor, the dough will bake quickly in about 2-3 minutes. The tandoor’s intense heat will cause the bread to puff up and form crispy charred spots on the surface.
- In the oven, cook for about 4-6 minutes or until you see slight charring and the bread puffs up. If using a stovetop, you can cook the roti on a cast-iron skillet or griddle over medium-high heat, flipping it once it puffs up to ensure both sides are evenly cooked.
-
Serve:
- Once the Tandoori Roti is cooked, remove it from the tandoor, oven, or skillet. Brush the hot roti with a little ghee or butter to add flavor and softness.
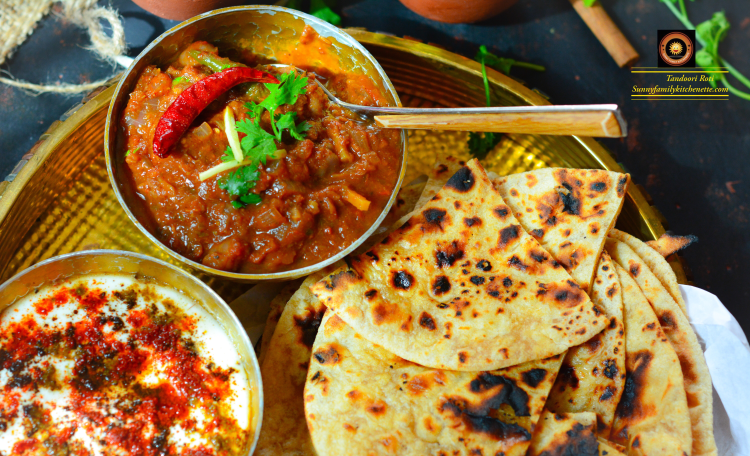
- Serve immediately with your favorite curries, gravies, or grilled meats.
Variations of Tandoori Roti
While Tandoori Roti is traditionally made from whole wheat flour, there are many variations depending on the region or personal preference.
-
Stuffed Tandoori Roti: This version is stuffed with ingredients like paneer, spinach, garlic, or potatoes, making it a more filling and flavorful dish.
-
Butter Tandoori Roti: Similar to naan, butter is brushed generously over the hot bread after baking to give it a rich, indulgent flavor.
-
Naan vs. Tandoori Roti: While both are cooked in a tandoor, naan typically uses refined flour (maida) and often includes yogurt, ghee, and milk, giving it a richer, softer texture. Tandoori roti, on the other hand, is simpler, usually made with whole wheat flour and no dairy, making it a more rustic, hearty option.
Pairing Tandoori Roti
Tandoori Roti is best served with hearty, flavorful dishes. Here are some popular pairings:
-
Dal Tadka: A spiced lentil curry with tempering (tadka) of ghee, garlic, and cumin.
-
Butter Chicken: A rich, creamy chicken curry with a tomato-based gravy.
-
Palak Paneer: A flavorful curry made with spinach and Indian cottage cheese (paneer).
-
Tandoori Kebabs: Grilled meat skewers marinated with aromatic spices and served hot alongside fresh tandoori roti.
Making Tandoori Roti Without a Tandoor
Although the best results come from a traditional tandoor, you can still make Tandoori Roti at home with a few adjustments:
-
Oven: Preheat your oven to the highest setting (usually 500°F or 260°C) and use a baking stone or an inverted baking sheet to replicate the heat of the tandoor.
-
Stovetop: Use a cast-iron skillet or griddle to cook the roti over medium-high heat. Flip the roti once it puffs up, pressing gently to ensure even cooking.
-
Pizza Stone: If you have a pizza stone, place it in the oven as it will mimic the heat-retaining properties of a tandoor and help in creating a crispy, charred crust.
Conclusion
Tandoori Roti is more than just a food type of bread—it’s a symbol of Indian culinary traditions, made using ancient techniques that bring out flavors and textures that cannot be replicated by modern ovens. Whether you’re cooking it in a clay tandoor or using a conventional oven, the result is the same: a warm, chewy, and slightly smoky bread that pairs perfectly with Indian curries and dishes.
By mastering the art of making Tandoori Roti, you not only add a classic touch to your meals but also connect with the deep-rooted history of Indian cooking. So, fire up your tandoor (or oven), and enjoy the satisfaction of making this delicious bread from scratch!